
Quick Summary
This comprehensive guide delivers practical electric gate troubleshooting procedures to help property owners diagnose unresponsive systems caused by electrical disruptions, photo-eye sensor blocks, or mechanical friction. By systematically verifying breaker power, cleaning and aligning safety sensors, and testing the manual release mechanism, users can safely identify and resolve common operating issues without unnecessary component replacements. Readers will gain the confidence to perform basic diagnostic checks while knowing when to contact Ironworks Gate Co. for same-day professional repair when high-voltage or complex mechanical failures occur.
Electric Gate Troubleshooting: Fast Fixes to Restore Access
When an automated driveway gate stops responding, the breakdown often comes down to an electrical power issue, a blocked safety sensor, or mechanical drag along the track. Before calling a repair service or replacing an operator, running through a basic diagnostic checklist can often get your gate moving again in minutes.
Automated gate operators combine electrical drive components with structural hardware. As the specialists at Ironworks Gate Co. note, the key to troubleshooting safely is isolating electrical supply issues from the physical movement of the gate so you can help identify where the issue may be occurring. See also Automatic Gate Repair – Call Now-10% Off – On-Site in 60 Minutes – Free Estimate.
This guide walks you through general troubleshooting steps, focusing on checking power, inspecting sensors, and testing manual release operation.
What You Need Before Troubleshooting Your Electric Gate
Before opening any control box, gather a few basic tools, disconnect power at the breaker, and inspect the physical frame. A methodical check keeps you safe and helps prevent damage to electrical components.
Safety Gear and Basic Diagnostic Tools
Set aside these hand tools before servicing your operator:
- Digital multimeter: To test electrical voltage, power outputs, and circuit continuity.
- Insulated hand tools: Standard screwdrivers to inspect terminal connections and adjust mechanical components.
- Cleaning supplies and dry lubricant: Microfiber cloths for optical lenses, a soft brush for debris, and dry silicone spray for pivot points and rollers.
Initial Visual Inspection and Emergency Shutoff
Always turn off the breaker or disconnect switch before touching wiring. Automated gates can pose safety risks during unexpected movement. Look closely for bent track hardware, dragging pickets, or sagging hinges before attempting electrical adjustments.
Step 1: Verify Power Supply and Control Board Indicators
Open the operator housing and check the main power feed first. If the gate does not respond, examine the indicator lights on the control board. Indicator lights often show whether the board is receiving power or if an active fault or safety stop may be present.
Checking the electrical supply first helps prevent unnecessary adjustments when the issue may simply be a tripped breaker or blown fuse.
Checking Main Breakers and Power Connections
- Verify Electrical Feed: Check the main breaker panel and reset any tripped switches. Inspect the surge protector or fuses for signs of damage if accessible.
- Test Battery Backup: For battery backup systems, check that the batteries hold sufficient charge. Low battery voltage may prevent the system from operating the motor properly.
Checking Status Indicators
Many operator boards provide status or diagnostic indicator lights. Checking these indicators against the system diagram can help show whether the board may be receiving an active stop command or experiencing an electrical fault.
Step 2: Inspect and Clean Photo-Eye Safety Sensors
Need electric gate troubleshooting?
We’re available now - call for a fast, free estimate.
When an automatic gate opens but will not close, the safety sensors are often the primary cause. If an obstruction interrupts the sensor beam, the control board typically holds the gate open to prevent contact.
Clearing Physical Obstructions and Debris
Insects, dirt, and outdoor debris can settle on sensor lenses. Remove any covers carefully, wipe away dirt and cobwebs, and inspect sensor wiring for visible damage or wear.
Testing Alignment and Sensor Function
- Check the Alignment Light: Look at the indicator light on the sensor. A steady light often indicates proper alignment, while an unlit or blinking indicator may indicate misaligned or obstructed sensors.
- Realign the Sensor: Adjust the mounting bracket until the beam aligns properly with the reflector or receiving sensor, then secure the hardware firmly.
- Perform an Obstruction Test: Pass an object in front of the sensor to confirm that the indicator responds and the system detects the interruption.
Step 3: Check Mechanical Load and Track Alignment
Before assuming a motor has failed, inspect the gate for physical binding. Mechanical friction can cause the operator to stop or reverse if it encounters excessive resistance.
Checking Track and Structural Alignment
According to Ironworks Gate Co., temperature changes and ground settling may cause metal frames, rollers, or ground tracks to bind. Ensure the gate moves freely along its path and check that hinge clearances and track alignments are intact.
Assessing Rollers, Hinges, and Drive Components
Inspect mechanical components while the gate is clear:
- Inspect rollers and wheels for wear, rust, or binding.
- Check hinges for proper alignment and lubrication.
- Inspect drive chains or belts to ensure they have appropriate tension without excessive slack or overtightening.
Step 4: Test Access Controls and Inputs
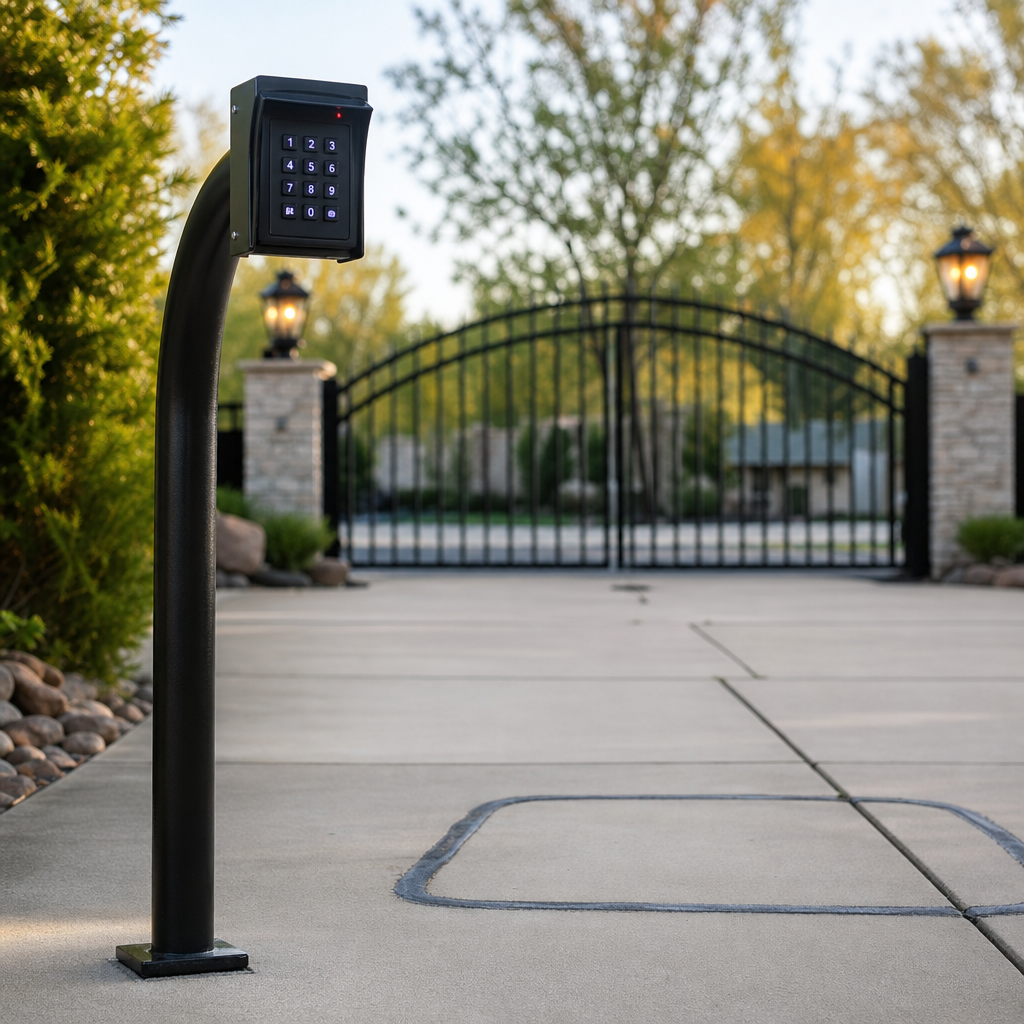
If the operator has power and clean safety sensors but does not respond, a control accessory may be holding the system in an open or stop state.[1]
Testing Remote Transmitters and Controls
- Replace transmitter batteries and verify that remote antennas are positioned properly.
- Test manual push buttons or wall controls to determine if the issue is limited to the remote transmitter or radio receiver.
Checking Hardwired Accessories
- Check external accessories such as keypads, intercoms, or exit buttons to ensure contacts are not stuck in an active state.
- Inspect loop detectors or vehicle sensors to ensure they are not falsely triggering a hold-open command.
Step 5: Safely Disengage and Test Manual Release Operation
Need electric gate troubleshooting?
We’re available now - call for a fast, free estimate.
Testing manual release operation allows you to verify that the gate moves freely and confirms you can operate the gate manually during a power outage.
Using the Emergency Manual Release
- Use the manual release key or disconnect lever according to the operator instructions to decouple the motor drive.
- Move the gate through its full path of travel by hand to ensure it glides smoothly without binding or dragging.
Safety Precautions During Manual Operation
Inspect physical end stops before manually moving a sliding or swinging gate to ensure the gate panel remains securely on its track or hinges.
General Gate Opener Troubleshooting Considerations
Troubleshooting requires matching your checks to the general setup of the system. Residential gates and commercial operators share core operating principles but may experience different wear patterns depending on usage frequency.
Access Control and Safety Diagnostics
Always distinguish between a complete loss of power and an active safety sensor lockout. If a gate opens and then reverses or stops, the system may often be responding to a triggered safety sensor rather than an internal motor fault.
Overview of Common Gate Issues and Diagnostics
Most gate problems can be grouped into electrical supply issues, sensor alignment errors, or mechanical binding. Use this overview to guide your initial checks:
| Issue Category | Targeted Component Check | Mechanical Alignment | Operator System Inspection |
|---|---|---|---|
| Common Cause | Dirty photo eyes, damaged sensor wires, blown fuses | Track misalignment, sagging hinges, worn rollers | Power supply loss, low battery voltage, damaged control boards |
| Diagnostic Focus | Clean lenses, verify sensor alignment, check continuity | Test manual movement, inspect track level, check drive tension | Check status lights, verify line power, test backup batteries |
Professional Evaluation
While clearing debris, resetting breakers, and checking sensor alignment are standard troubleshooting steps, complex electrical faults, internal motor repairs, and high-tension hardware carry safety risks. When basic troubleshooting does not resolve the issue, a qualified gate technician such as those at Ironworks Gate Co. should be consulted.
Frequently Asked Questions About Electric Gate Troubleshooting
Why is my electric gate not opening or closing?
Common causes often include a tripped circuit breaker, dead remote transmitter batteries, misaligned or dirty safety sensors, or mechanical obstruction along the track. Check the power supply first, inspect the safety eyes, and ensure the manual release mechanism is engaged properly for motorized operation.
How do I know if my electric gate sensors are malfunctioning?
Check the indicator light on the sensor. A steady light often indicates normal alignment, while a flickering or unlit LED may indicate an obstruction, dirty lens, or misaligned bracket. If the gate opens normally but refuses to close, the safety sensor circuit may be active or obstructed.
Why does my gate motor hum or click without moving?
A motor that clicks or hums without moving may indicate insufficient operating voltage, a motor component issue, or mechanical binding along the track, rollers, or hinges that physically restricts movement.
How do you manually open an electric gate during a power outage?
Use the operator’s manual release key or disconnect lever to disengage the drive mechanism. For linear arm operators, release the quick-release pin connecting the arm to the gate bracket, allowing the panel to be moved by hand.
What causes an automatic gate to open and then immediately close?
This symptom may indicate misadjusted limit switches, an active safety sensor, or an obstruction sensing issue. If the gate encounters resistance or an incorrectly set limit, it may automatically reverse as a built-in safety response.
When should I call a professional gate repair technician instead of troubleshooting DIY?
Contact a qualified technician if you observe damaged high-voltage wiring, suspect internal electrical or motor component failures, or encounter structural hinge and track damage. High-voltage power feeds and heavy moving panels present safety hazards that may require specialized tools and service.
Need electric gate troubleshooting?
We’re available now - call for a fast, free estimate.
Sources
- [PDF] 115 VAC Control Boxes for – Doorking – doorking.com
Related reading: Driveway Gate Repair | Call Now-10% Off | On-Site in 60 Minutes | Free Estimate
Related reading: Electric Gate Repair – 10% Off & Free Estimate – On-Site in 60 Minutes
Related reading: Emergency Gate Repair | 10% Off & Free Estimate | On-Site in 60 Minutes
Frequently Asked Questions
How do I perform a hard reset on an electric gate control board after a power surge?
Turn off the main AC power breaker and disconnect the backup battery terminals for at least 60 seconds to completely discharge residual power. Reconnect the batteries, restore main power, and initiate a cycle using a wired push button or remote. If the board remains unresponsive or indicator lights do not illuminate, Ironworks Gate Co. provides same-day diagnostic support to inspect for surge-damaged control components.
Why is my electric gate operator beeping continuously?
Repetitive beeping usually signals a low-voltage fault in the battery backup, an active safety edge contact, or an inherent entrapment protection lockout. Inspect the control board LED display for diagnostic flash codes and confirm battery voltage meets system specifications. If the beeping persists after clearing physical sensor paths and resetting power, schedule a diagnostic assessment with Ironworks Gate Co. to test the board circuitry.
How do weather and temperature shifts cause automatic gates to stop halfway?
Cold snaps and ground settling cause metal framing to contract and ground tracks to shift, creating excessive mechanical friction along rollers and hinge points. When the operator detects this increased resistance, its built-in force limit triggers an emergency stop or safety reversal. Applying a dry silicone lubricant along pivot points can ease minor resistance, but persistent binding often requires professional track and hinge realignment.
About the author
 |
Marcus Caldwell Marcus Caldwell is a perimeter security specialist with over eight years of experience in access control systems and automated gate solutions. He frequently writes about residential and commercial gate maintenance, focusing on practical troubleshooting and cost-effective repair strategies for property owners in the DFW metroplex. Marcus holds a certification in Automated Gate Systems Design from the American Fence Association. |
Gate not opening, off track, or opener dead?
We’re available now - call for a fast, free estimate.
Call Now - Free Estimate